
A new trend has found it’s place, and it’s all about meeting your dream celebrity, capturing a selfie with them on the shooting set itself.
I myself saw YouTube videos on it, but most of creators using Kling AI to make this trending video. And we all know, Kling AI is not free, nor it’s free credits are so good.
Today I will show how to make this trending celebrity selfie AI video using Veo + Nano Banana Pro. And we won’t be in need of any subscription as we will be using a free method.
Okay, enough talk, let’s move straight to the step by step guide. I have tried my best to keep this tutorial as simple as I can, so good luck.
Key Takeaways:
- We will be using Nano Banana Pro through Gemini to generate our celebrity selfies first. And the prompt can be found in the tutorial below.
- Will be using Veo 3.1 instead of Kling AI which will convert our images into videos for free. This prompt too can be found below in the guide.
- We can only make 8 seconds of video in Veo 3.1 as all of know, so only 2 celebrity selfies can be covered in a single video.
Step by Step Tutorial:
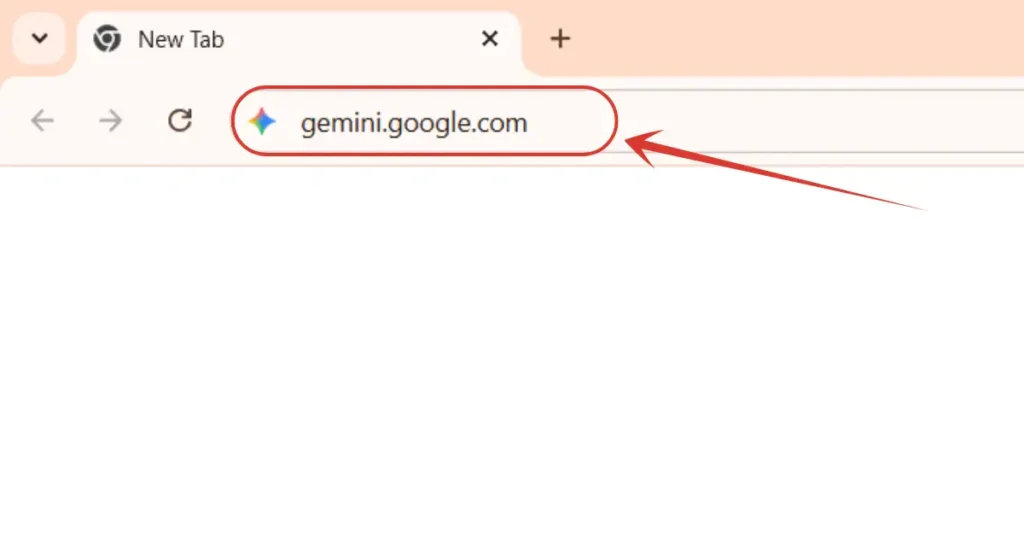
1. Will first go to https://gemini.google.com/ to create our initial images.
And, there is a good news for you guys. Google has announced Gemini Pro for 18 months, all for free. All you need to do is, read this tutorial where I have explained it step by step.
2. Click on the 1st position as shown in the image down there, and select “Pro” mode if it’s set to any other engine.
● 8 Trending Gemini Boys Birthday Prompts for a Truly Magical Celebration

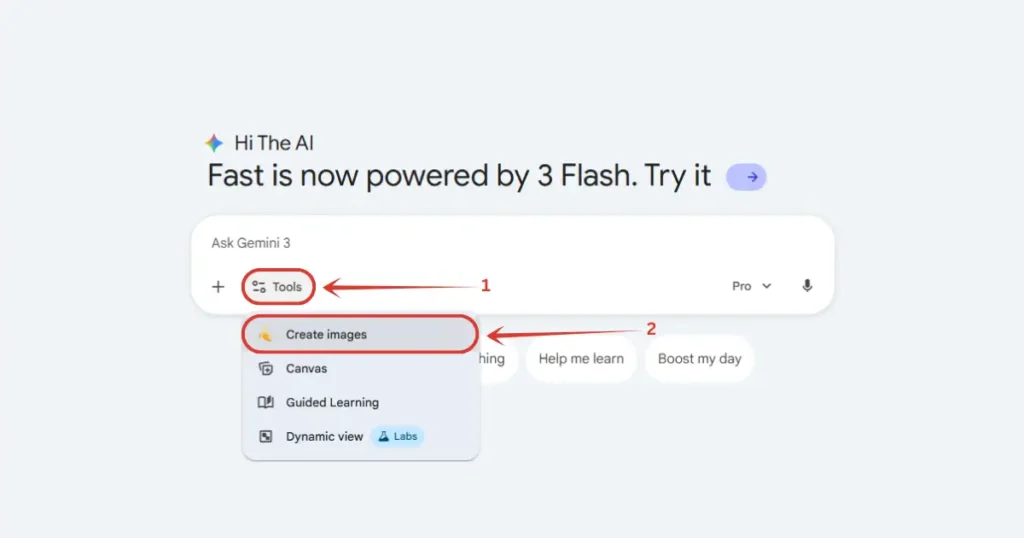
3. After that, click on “Tools”, and select “Create images” from the dropdown list
4. Then click on the + icon, and select “Upload files” option, and upload your image.
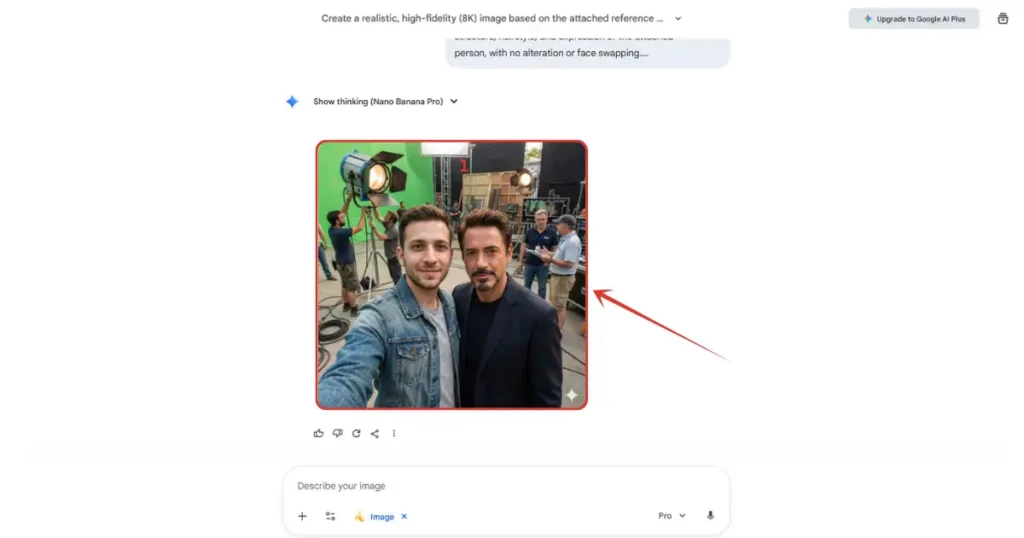
5. As you can see in the image down there, I have attached photo + wrote the prompt a well. Copy the prompt from below, and at placeholders like [Celebrity] and [Set/Location] add your preferred ones as I have added Robert’s here, we know him as Iron Man.
Copy Prompt: “Create a realistic, high-fidelity (8K) image based on the attached reference photo. Maintain the exact facial features, skin tone, bone structure, hairstyle, and expression of the attached person, with no alteration or face swapping. The attached person is taking a selfie with [Celebrity], standing at [Set/Location]. Crew members are adjusting internal lighting and equipment, with cables and gear visible. Directors and managers are standing behind, discussing the next take.“
![As you can see in the image down there, I have attached photo + wrote the prompt a well. Copy the prompt from below, and at placeholders like [Celebrity] and [SetLocation] add your preferred ones](https://theaitutorials.com/wp-content/uploads/2025/12/As-you-can-see-in-the-image-down-there-I-have-attached-photo-wrote-the-prompt-a-well.-Copy-the-prompt-from-below-and-at-placeholders-like-Celebrity-and-SetLocation-add-your-preferred-ones--1024x538.webp)
6. And our image is ready. Realistic, emotionful, and perfect. Download it.
● How to Create Trending AI Glowing Girlfriend Photo for Free? Step by Step Tutorial
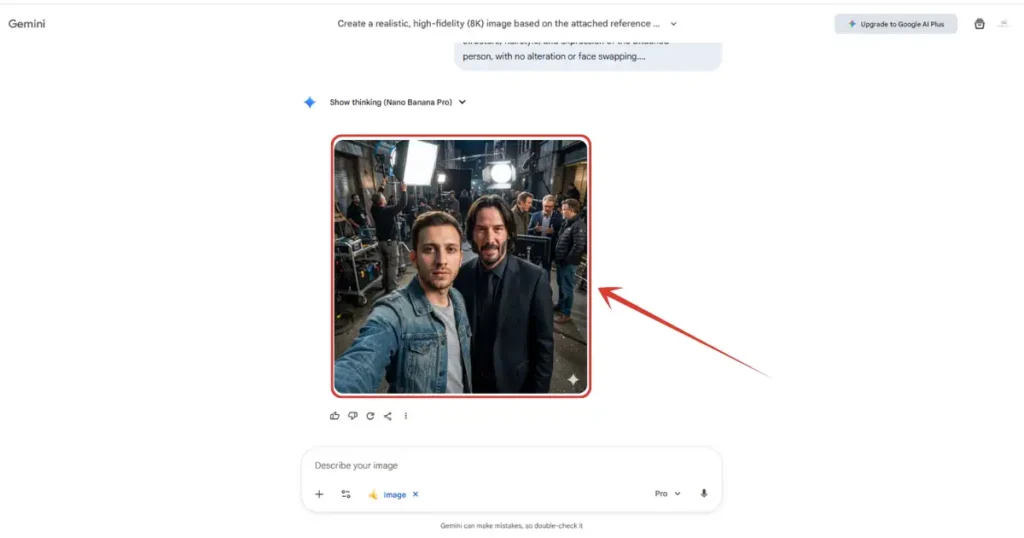
7. You will be in need of two images like this. So create another image. As you can see, I already have created one, with John Wick this time. Download this image as well.
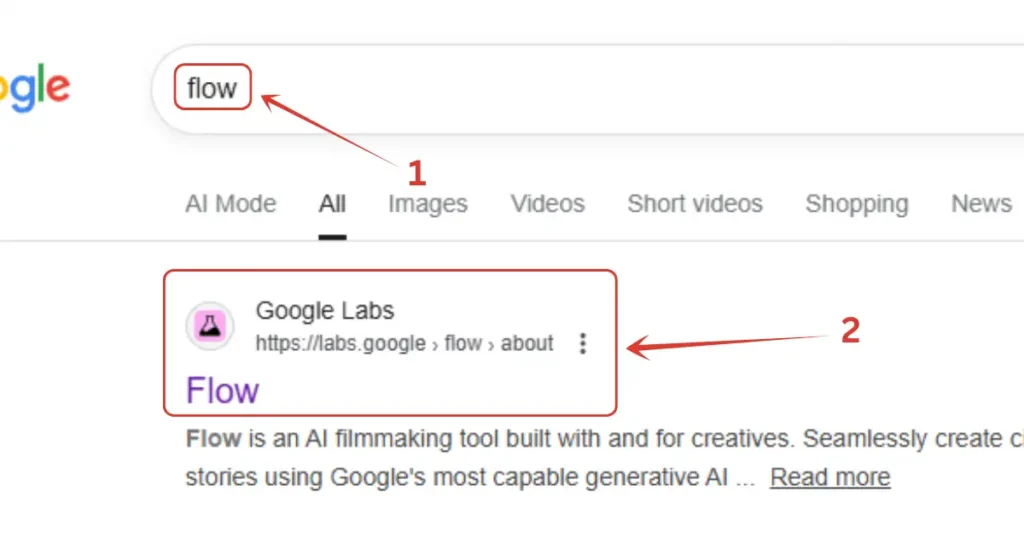
8. Now we will head to Google Flow. Search in Google, and click on first website.
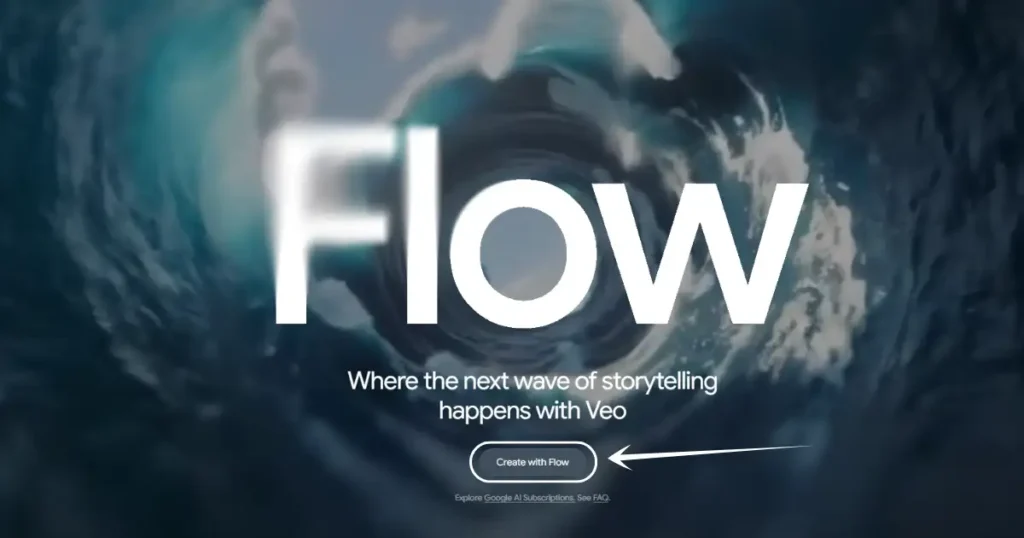
9. Then click on “Create with Flow” button down there.
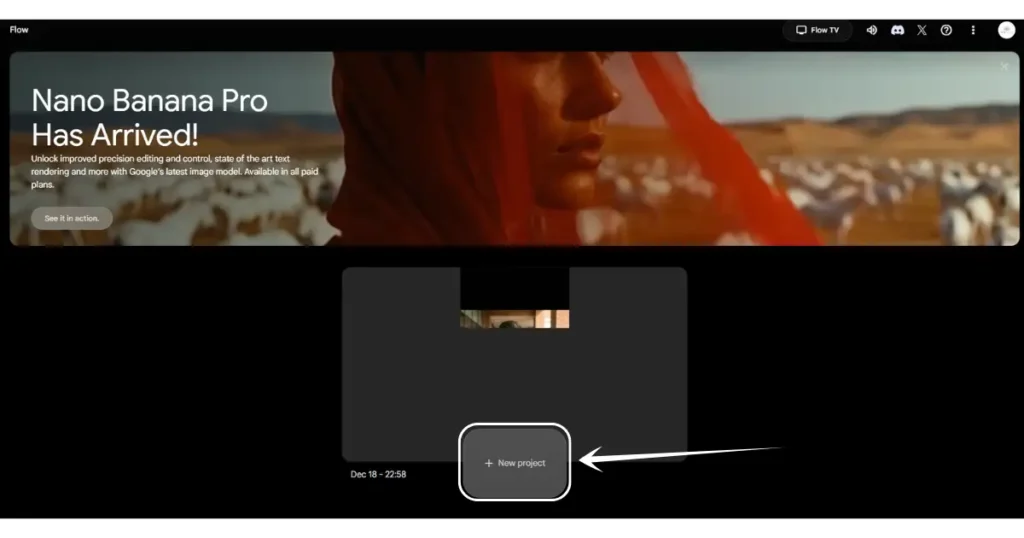
10. After that, click on “New project” button. By the way, if you visit Flow for the first time, it will ask to sign up, so do sign up and reach your dashboard just like this.
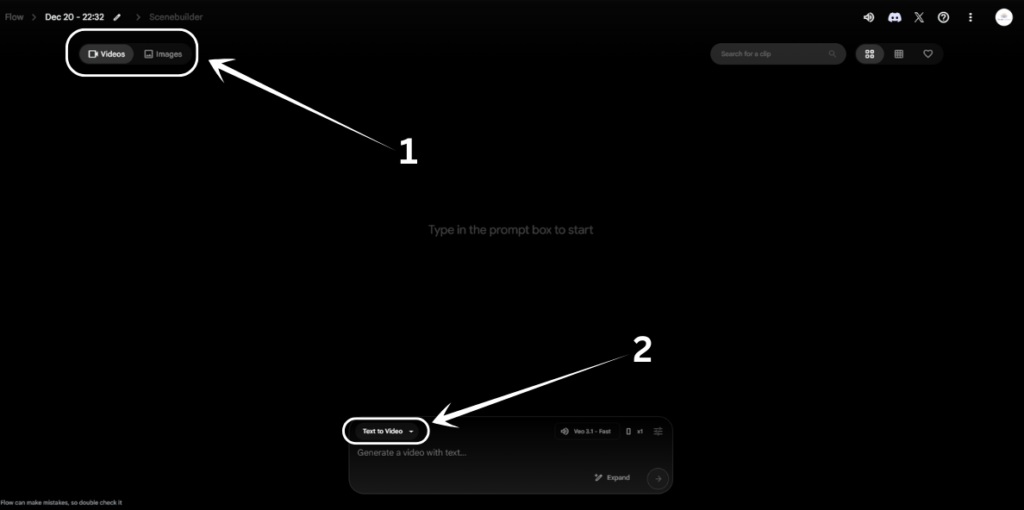
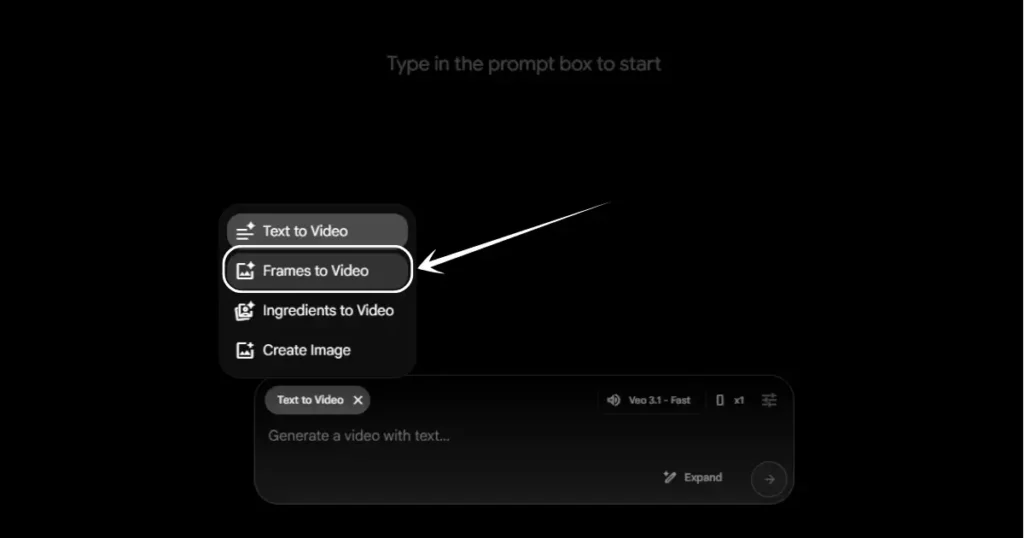
11. Once you land on this page, set it to “Videos” if it’s not, and click on “Text to Video” option.
12. After clicking on “Text to Video” option, a list will appear just above it, select “Frames to Video” option there.
● How to Make Trending Your-Own AI Mini Replica Video? Step by Step Tutorial
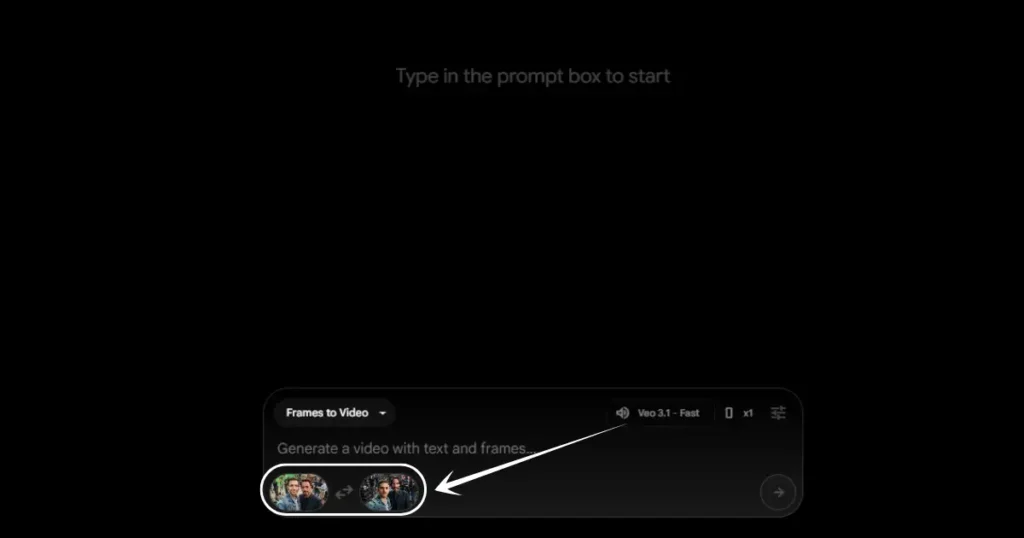
13. As you can see, after selecting “Frames to Video” option, we are enabled with two input boxes here where our two images will be uploaded. One with Iron Man, another with John Wick.
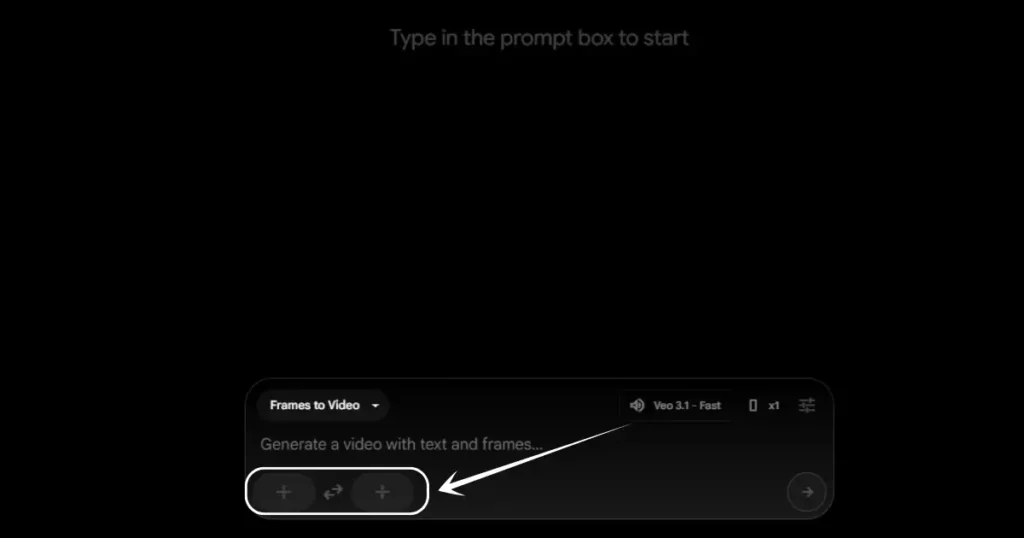
14. Click on the first left + input box, and then click on “Upload” option above it where you need to upload you first image.
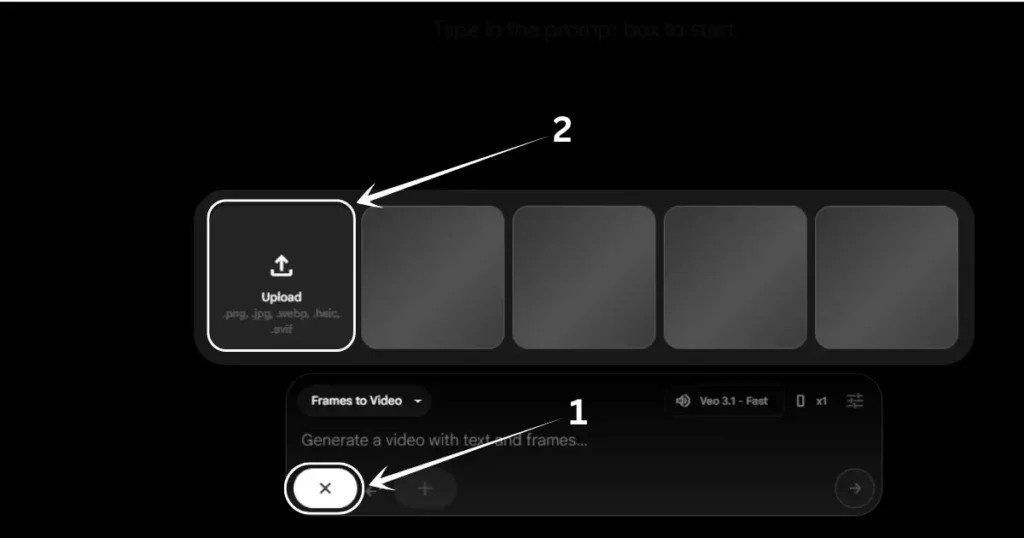
15. As you can see, I am done uploading my first image with Iron man. I will do the same with the right sided + input box and upload the image with John Wick.
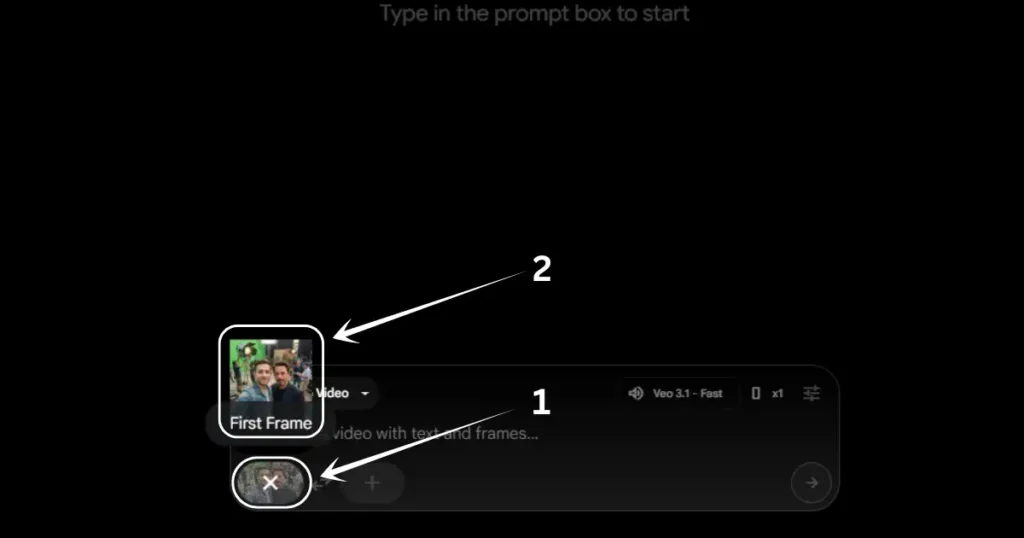
16. We are done uploading both of our images now. Now the most important part is left, which is the prompt.
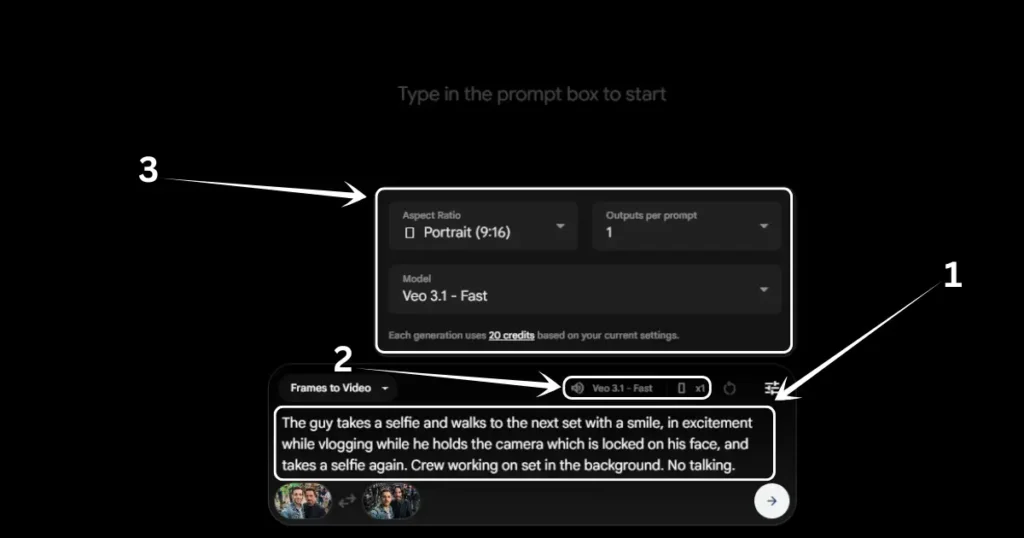
17. Copy and paste the prompt from below. Then click on “Veo 3.1 – Fast” which will trigger a menu just above it, and copy all the settings which are shown in the image down there.
Copy Prompt: “The guy takes a selfie and walks to the next set with a smile, in excitement while vlogging while he holds the camera which is locked on his face, and takes a selfie again. Crew working on set in the background. No talking.“
18. And we are all set. Just click on the arrow button in the bottom, or hit enter button, and wait until the video generates.
● How to Make Trending AI Celebrity Selfie Video for Free? Step by Step Tutorial
Here is the video I generated, have a look. Ignore the aspect ratio for now lol. I would say when you generate the images, either generate portrait or landscape by describing it in the prompt, as flow only makes video in either portrait or landscape. Other aspect ratios feel not so good.
You may think why I used “Frame to Video” option instead of using “Ingredient to Video” option where we could have added even more photos. The reason is the length of the final output video. Veo generates only 8 seconds of video as of now, and only two celebrity selfies can be covered in a good way in these 8 seconds.
You just copy the last frame of the video, give that as the first input image, then generate another celebrity selfie from Nano Banana Pro and give as second input image, and then merge your videos to make it look a single video.
This may sound a bit struggling and time consuming, but, my friend, it’s better than paying to Kling AI, hehe.
People Also Ask:
It’s a new rising trend where people are creating images where they capture selfies with their favorite celebrities on shooting set, and convert that images into realistic videos.
It’s very simple. First generate multiple images where you are taking selfie with an actor on a shooting set using any AI image generating tool like Nano Banana Pro or ChatGPT. Then use Veo 3.1 from Flow. Give it the prompt which is shared in this tutorial, which will add animation between those two images and convert them into a realistic video.
Many sources are saying to use Kling AI, but I will say use Veo 3.1 from Google Flow. As it’s free and it gives free 180 credits for new accounts. So no need to pay. Or you can just follow the step by step guide shown in this post and you are good to go.
Conclusion
In this guide, we learned a simple and free way to create the trending celebrity selfie AI video.
Instead of using paid tools like Kling AI, we used Nano Banana Pro with Gemini to create realistic images, and Veo 3.1 with Google Flow to turn those images into a short video.
The steps are easy to follow, even for beginners, and no subscription is needed.
With a little practice and creativity, you can make your own celebrity selfie AI videos and join this popular trend without spending any money.


Leave a Reply